Laser cutting of Letters stencils or Numbers stencils
In this article, we will focus on the text and fonts stencils and we will review the various uses and possibilities of using letters and numbers and provide some tips for quick and correct work on numbers and letters.
Stencils of letters and / or stencils of numbers are used to mark products, packaging, various surfaces such as walls, floors, sidewalks, and more. Using stencils of single letters or digits, you can actually mark any text or number or combination of them. Here are some examples of the use of letters and numbers stencils:
- Signs in public parking lots on walls, columns and floor.
- Numbering of lighting poles or identification purposes.
- Graffiti art on indoor and outdoor walls and surfaces.
- Marking containers including information about the container and the content of it.
- Marking on wooden crates, barrels, storage tanks and more.
- projects with a typographic nature, such as text on walls.
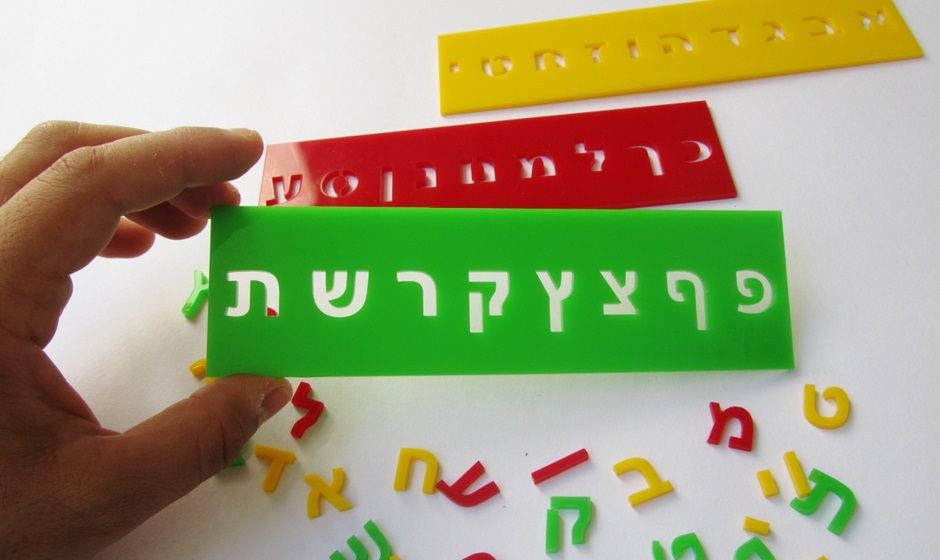
Laser cut lettering stencil - colored acrylic
Adjust fonts to suit stencils
In order for us to use letters and numbers to create stencils, we need to adjust some of them. in Hebrew there are "closed" letters such as "ס" or "ם" in which the inner part is trapped inside a cut area. In the English script there is a greater number of letters that require adjustment (A, B, D, O, P, etc.). In the literature ('0', '4', '6', '8' and '9') we encounter a similar situation. The solution is a minimal change of the letter or the number by creating 'mini-joints' ("bridges") that connect the inner parts of the letter to the stencil and hold them together.
When designing files for laser cutting to become stencils, all texts must be converted into linear objects, which is to prevent incompatibility between the fonts requested and the fonts installed in our systems.
There are commercially available fonts that are suited to work with stencils. These fonts contain the micro-joint solution for maintaining the loosen parts. This way you can write automatically without worrying about the problems that may arise during the cut.
Laser cutting Tips
Distance between letters - To make a well-spaced word from separate letters, one must be careful to maintain a reasonable margin on the sides of each letter. A quick way to achieve the right spacing is to construct the desired word, surround it with a rectangle, and divide the rectangle with vertical lines between each letter.
Line spacing - In the same way that a word can be divided into letters, you can also divide paragraphs into rows and add spaces between them.
Stencils - Depending on the type of painting required (spray, brush), u must leave sufficient edges around the exposed area of the stencil to protect the surface on which the stencil is applied. For example, for spray painting, a margin of between 5 and 15 cm is left on each side, and in another application (painting, sputtering) you can reduce margins as needed.
Applying a number of colors - You can plan a set of coordinated stencils in a layer structure, with each layer used to paint a different color. This way you can hide areas that have already been painted in the previous layer or will be colored in the next layer. This process requires accuracy in the positioning of the sheets in the layer. This way, for example, you can color the word 'peace' when each letter is painted with a different color.
Converting image text into a stencil - When a text source is not a vector entity and is not created in a word processing program, drawing program or vector software, but rather in a file that is an image, the lines that define the text must be extracted and a suitable file must be created for the laser cutting. First, the text image must be converted to a black and white image (1BIT) - white will define the stencil material and black will define the text - the areas to be cut out of the sheet. Next, make sure all the parts that make up the stencil are connected to each other. At this stage you can also handle "closed" letters and numbers. In the final stage, a graphic file must be drawn that is constructed of the vector lines that define the image / stencil.
Planning - You can think of a stencil as the negative of the image we want to paint. The holes / parts missing in the stencil are the ones that will get paint and create the image obtained on the painted surface.
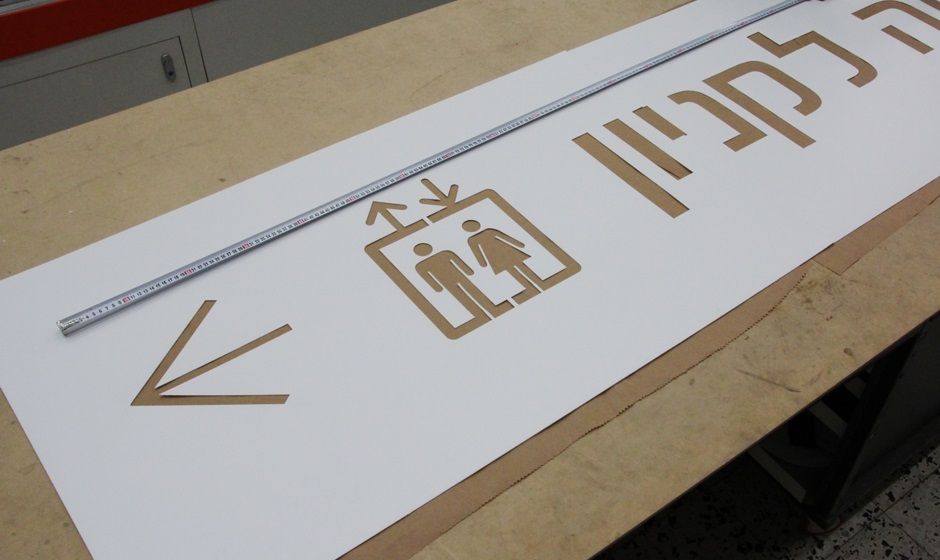
Laser cut big stencil to paint parking lots - polypropylene material